MQTT: Authentication
✅ Best for: Devices connecting via MQTT.
- Authentication is handled exclusively via certificates (no tokens).
- Certificates are tied to a System or Component (Device) in DRIVR.
- More secure for IoT environments (long-lived authentication).
- Can be provisioned during manufaturing of a device and installed within the factory
Before generating a certificate, you must create a System.
- Navigate to Systems → Create System
- Enter a Name & Confirm the Auto-Generated Code
- Click "Create" to finalize the system
Once your System is created, you can proceed to generate a certificate.
- Navigate to System → Certificates
- Click Add Certificate
- Modify the name & expiry date (if needed)
- Click Create → Download your certificate files
You will receive three files:
✔️ Private Key (.key)
✔️ Certificate (certificate.pem)
✔️ Certificate Authority (CA) (ca.pem)
In this guide, we will use MQTTX as the client to establish connections, publish messages, and subscribe to topics. You can download MQTTX app here or use MQTTX CLI here
After installing MQTTX or your preferred client, use the following command to make sure a connection to the broker can be established
mqttx conn -h mqtt.drivr.cloud -l mqtts -p 8883
            --key my-key.key --cert certificate.pem --ca ca.pem

✔ Connected
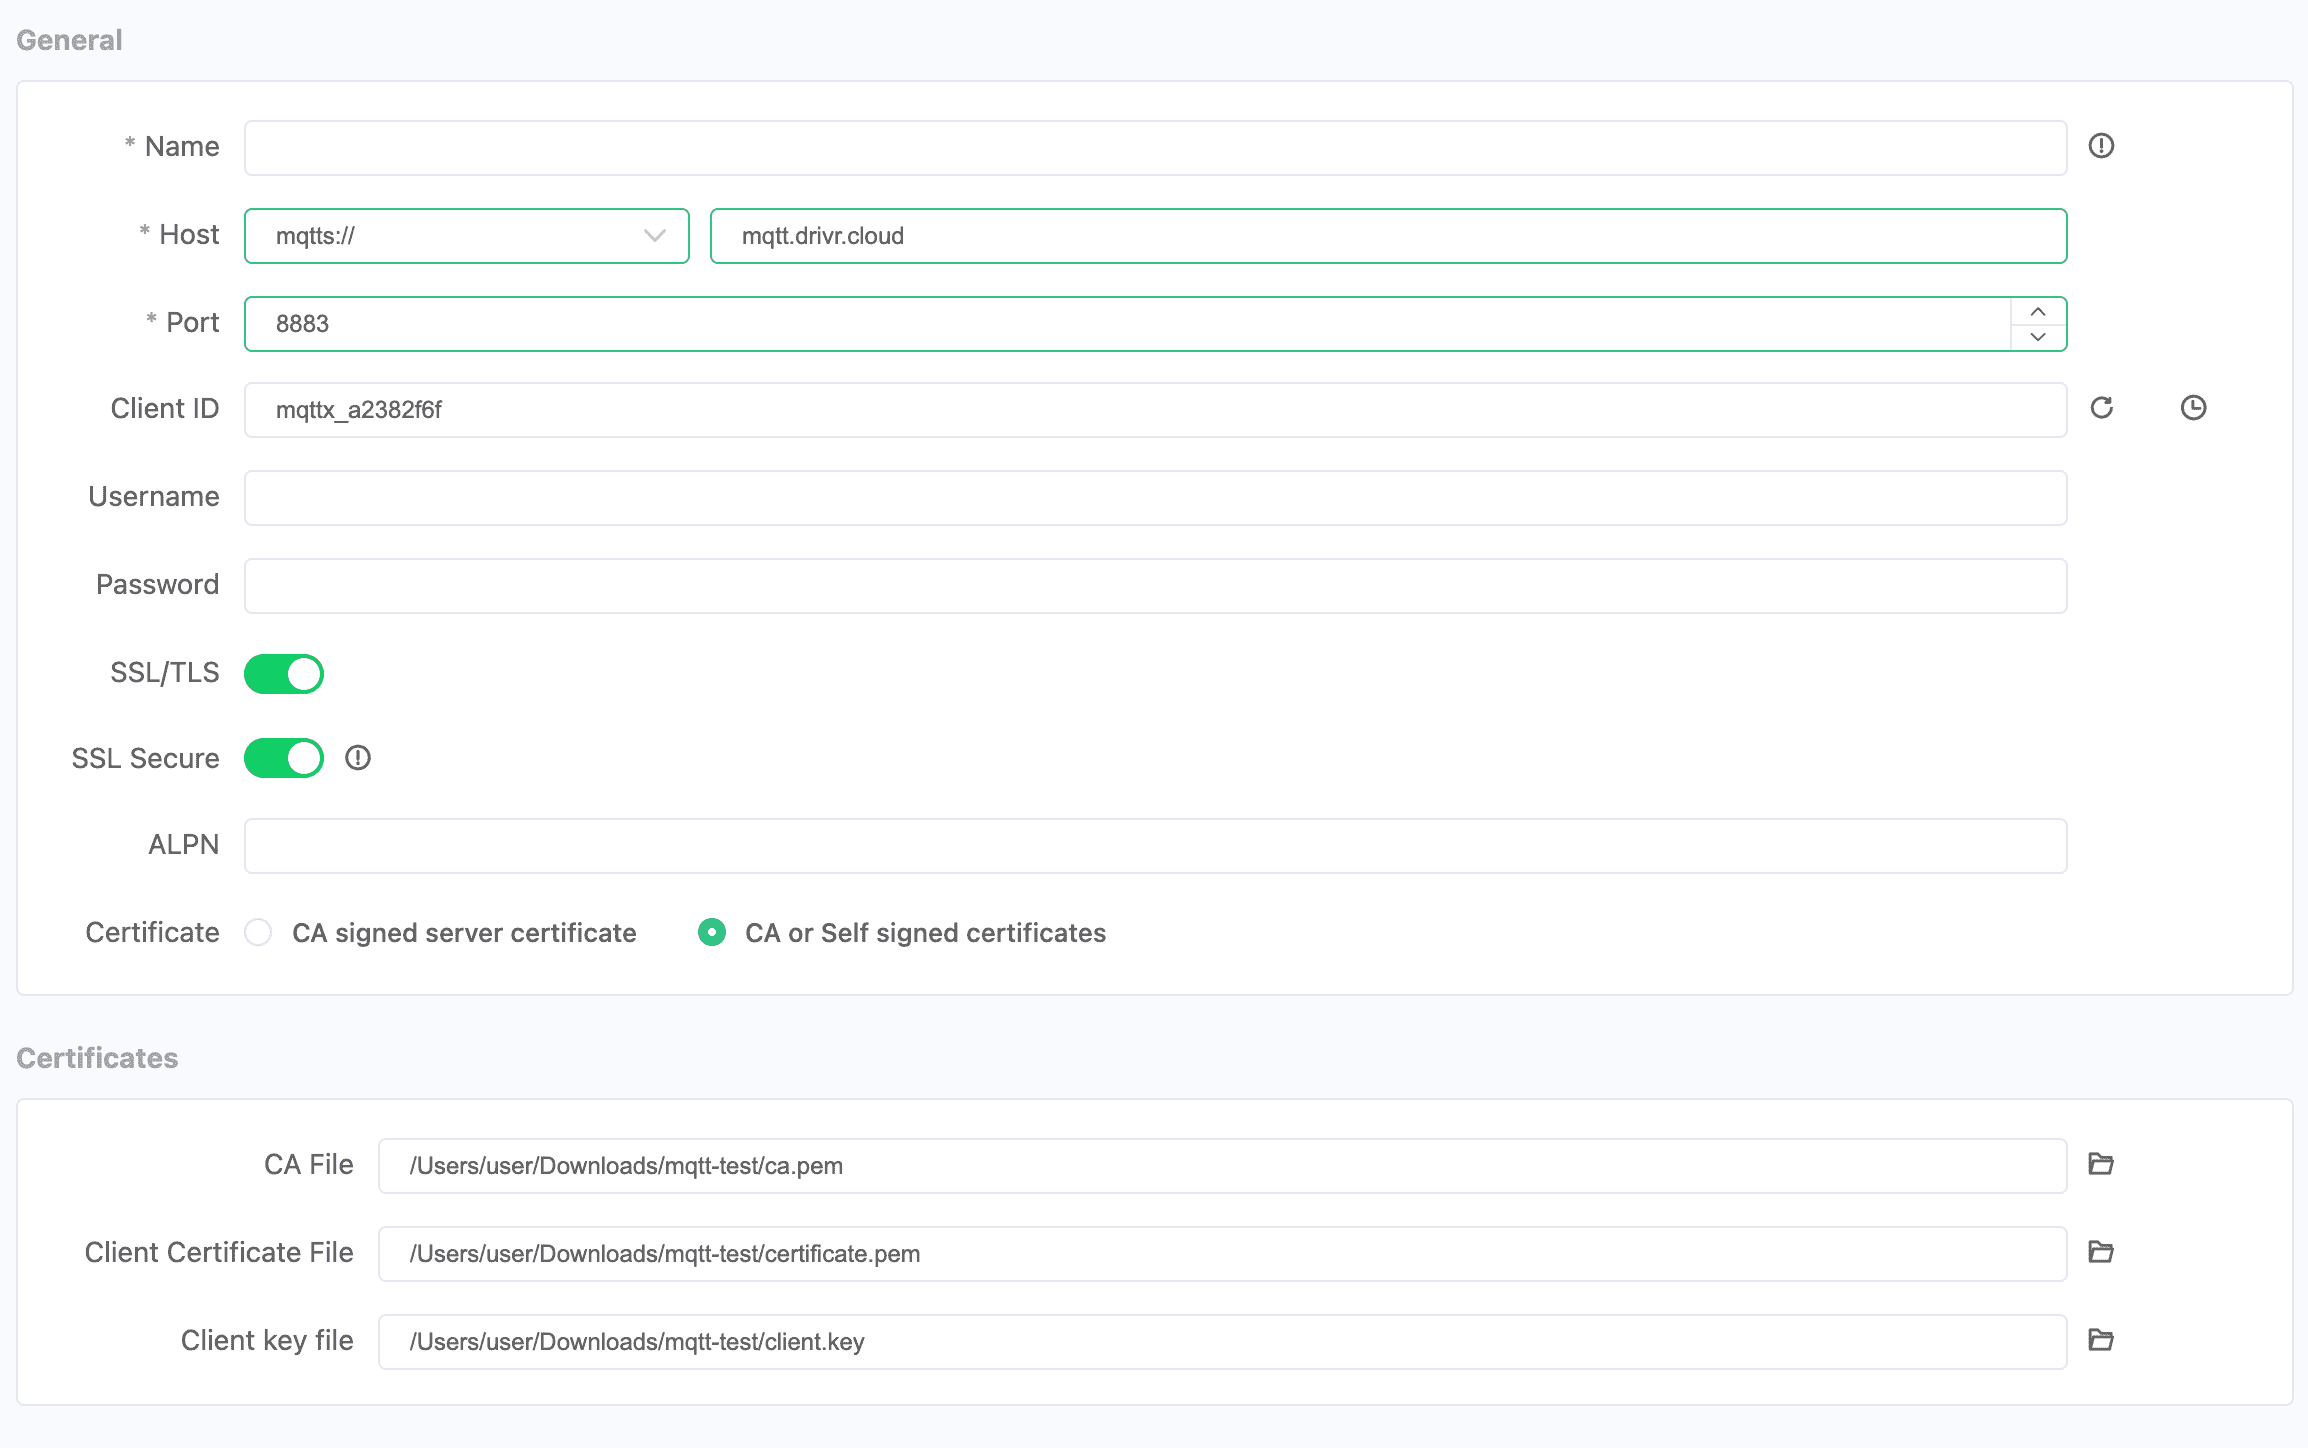
Alternatively, you can also use the desktop client to establish a connection, you need to make sure that the configuration is correct:
- The private key is NOT stored in DRIVR. If lost, you must regenerate the certificate.
- The Certificate Authority (CA) file is required for secure MQTT connections.
- The Cerfiticate expiry date can be set via UI
DRIVR UI is the easiest way to create a Certificate. Alternative ways to generate Certificate: